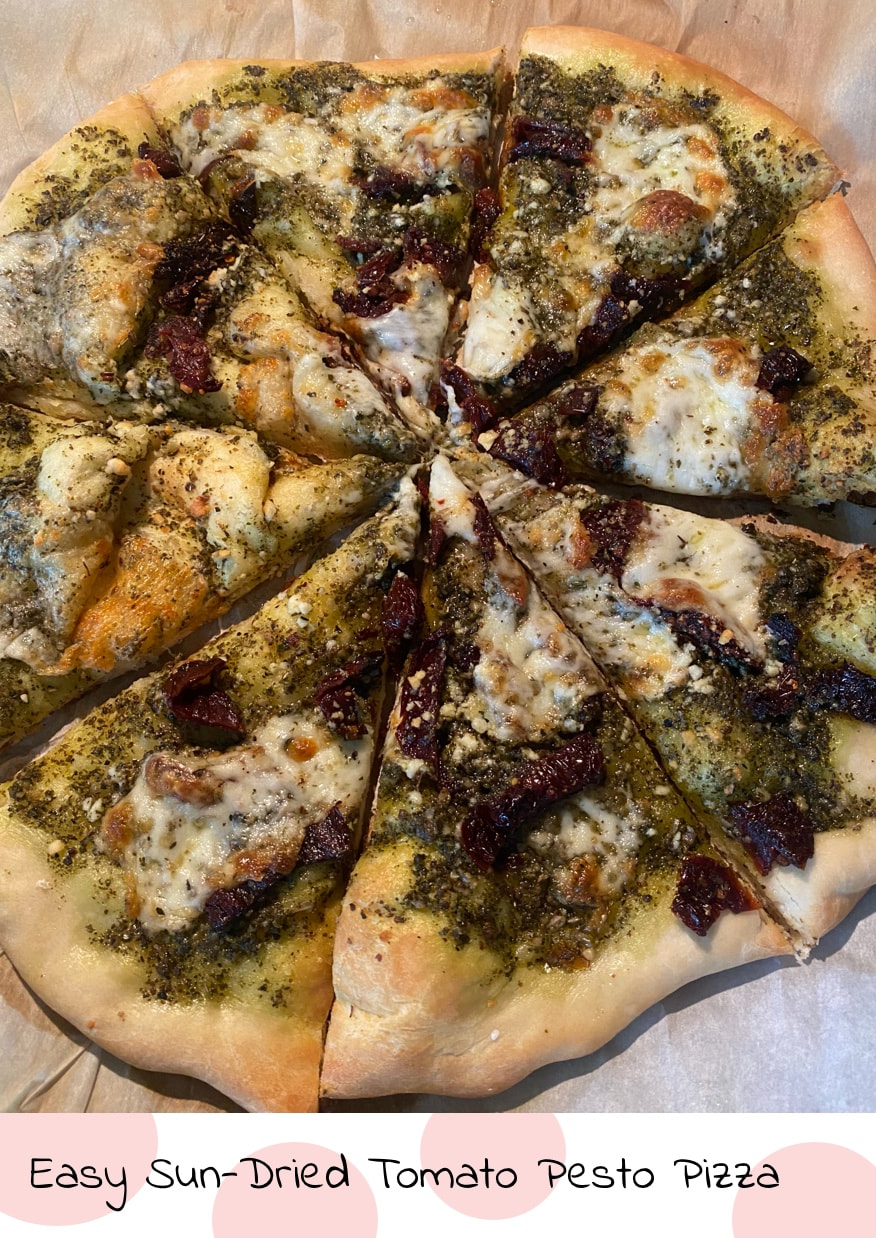
I was home alone this summer, super pregnant, and looking for something simple to make for dinner. I decided to head to Trader Joes to search for inspiration when I happened upon the pizza supplies... so I decided to try to make a unique pizza for dinner. I grabbed the pre-made refrigerated pesto and the herb crust and some mozzarella cheese and headed home. I gathered some sun-dried tomatoes from the pantry and began to work on my creation. The results... the easiest most flavor-full pizza ever that I enjoyed eating outside while watching the sunset! Why am I writing about this summer evening in the dead of winter, well, because we made this pizza again last night and it was true perfection. While I admit, it is not really a make ahead recipe, it does work well for leftovers and it is really super simple to make. I hope you enjoy this pizza!
Ingredients 1 pizza crust (I used the garlic herb crust from Trader Joes) 1/2-3/4 cup of pesto (I used the refrigerated Genova Pesto from Trader Joes) sun-dried tomatoes (in oil) whole milk mozzarella cheese cut in thin slices Directions 1. Preheat the oven to 425 degrees (or follow directions for the pizza crust you make/buy) 2. Lay out a large piece of parchment paper, sprinkle the pizza dough with a bit of flour and then roll the dough thin 4. Slide a pizza pan under the parchment paper for easy transfer to the oven 3. Add toppings - Pesto, sun-dried tomatoes and lastly the mozzarella (add as much or as little as you like) 4. Carefully slide the pizza/parchment off of the pan and into the oven. This is KEY for crispy crust. Make sure your parchment is oven-safe. Bake for 10-12 minutes until edges are crispy. 5. Enjoy warm OR as leftovers for lunch the next day!
0 Comments

Ingredients:
8-10 medium sized tomatoes quartered 1 yellow onion quartered 5 whole cloves of garlic (skins removed) A bunch of fresh sage leaves (about 10 leaves) 1 tsp dried thyme Salt and pepper to taste 3 TBs olive oil 1 cup shredded sharp cheddar cheese 1 cup unsweetened almond milk 10 oz of tortellini Handful copped fresh Basil Directions: 1. Preheat oven to 425 degrees 2. Add tomatoes, onions, garlic, sage, thyme, salt and pepper to a large oven safe pot and drizzle with olive oil .. roast for 30-35 minutes until tomatoes release juices and the onion starts to char 3. Meanwhile Cook the tortellini according to package directions. 4. Remove the veggies from the oven and carefully add to a high speed blander and blend on high until creamy. 5. Return soup to the pot and add the shredded cheddar along with the almond milk. Heat on medium until the cheese melts and is incorporated. 6. Remove from the heat and add the cooked tortellini and chopped Basil. ENJOY! 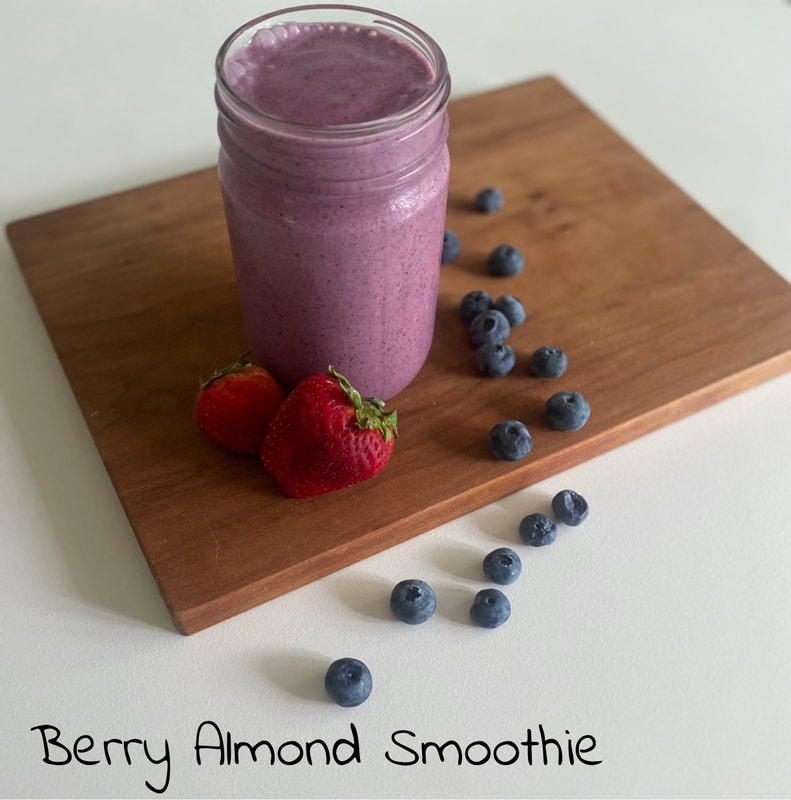
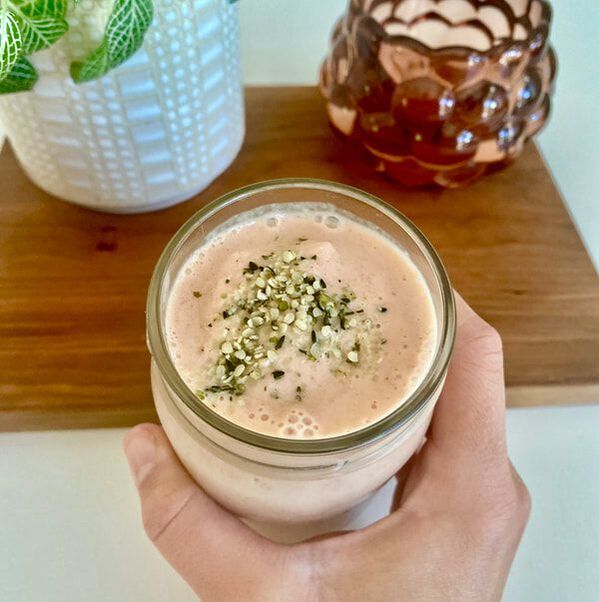
There is something about summer that makes me crave berries. The endless fields of blueberries on our trip to Michigan totally inspired this smoothie recipe. Everywhere you look, this time of year, they sell fresh picked blueberries in southwest Michigan. Our vacation was such a different experience this year with three little ones. It was filled with joy and fun but in quite a different way than in past years. I love how we have this time together each year and how we can now share that with our little boy. I always miss my daily smoothies when we are away so I made this one when we arrived home. The creamy almond butter coupled with the sweet and tart berries blend into a creamy treat perfect for your morning routine!! I hope you enjoy. As always, please leave a comment if you try out our recipe! ENJOY!
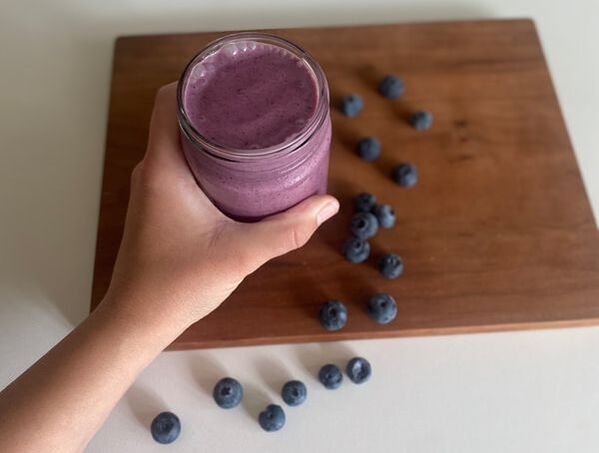
Berry Almond Smoothie
1 frozen banana 1 cup of mixed frozen blueberries & strawberries 2 T creamy almond butter (unsalted) 1.5 cups of unsweetened almond milk 1/4 cup of vanilla yogurt Blend all of the ingredients together in a high speed blender until creamy. Makes two smoothies. To make ahead: place all of the ingredients minus the yogurt and almond milk into a freezer safe container. Freeze overnight. In the morning add the contents along with the yogurt and almond milk to a high speed blender until creamy. 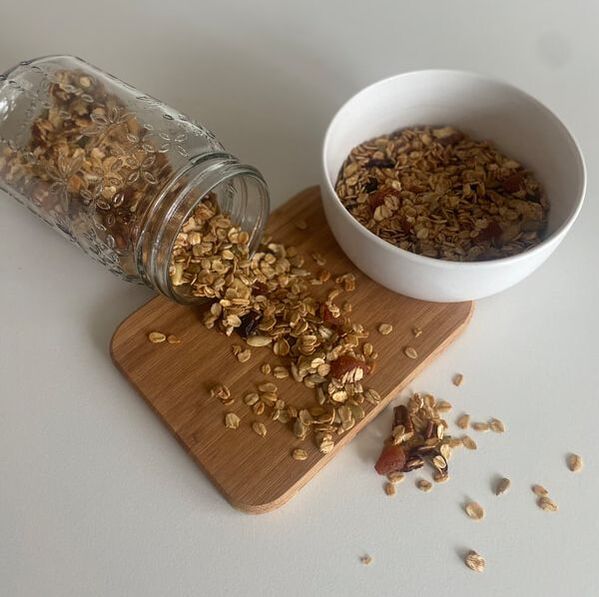
It sure has been awhile since I last posted a recipe. Many changes have been underway in our lives. I decided to leave my job as a teacher and pursue a certificate in User Experience Design. I have been working full time as a nanny since August while working on my certifications. We are also delighted to be welcoming another member of our family later this summer! With all of these changes plus the ongoing challenges of the pandemic I have been forced to put this blog on the back burner (pun intended). I have, however, still been creating recipes and have quite a log of new ones to share with you all in the future.
We just got back from our babymoon to Michigan where we were extremely blessed with AMAZING weather, 75 degrees in March + tons of beaches with no on one else in sight. It was truly unexpected and wonderful! We stayed at a lovely two room farmhouse near the dunes and we brought our own breakfasts and dinners and ordered lunch to go each day. One of the breakfast items I bought with is one of our favorite breakfast foods of all time, granola. This recipe came to me as I was browsing the aisles of Aldi. I came across their dried fruit section and it reminded me of a granola recipe I tried awhile back where they had the genius idea of softening the fruit before baking it. I decided to buy some apricots and dried sour cherries and when I got home I combined them with my favorite nuts and seeds and a dash of cinnamon and a couple dollops of honey. The results were rather tasty and I have since made this numerous times. When using dried fruit in your granola it is important to soften them first, the method shown below is one I got from this recipe from Happy Hearted Kitchen. If you don’t soften them first, they tend to burn upon baking them, so make sure you don’t skip that step. This is a perfect Make Ahead of Monday for you and your family to enjoy. When stored properly it can last up to two weeks! I hope you enjoy this Apricot, Cherry, Pecan Granola! Apricot - Cherry - Pecan Granola 1/2 cup dried apricots 1/2 cup dried cherries 1/2 cup water 1/4 cup coconut oil 3 tablespoons honey 3 cups rolled oats 1/2 cup raw pepitas 1 cup raw sunflower seeds 1 cup chopped raw pecans 1 teaspoon cinnamon 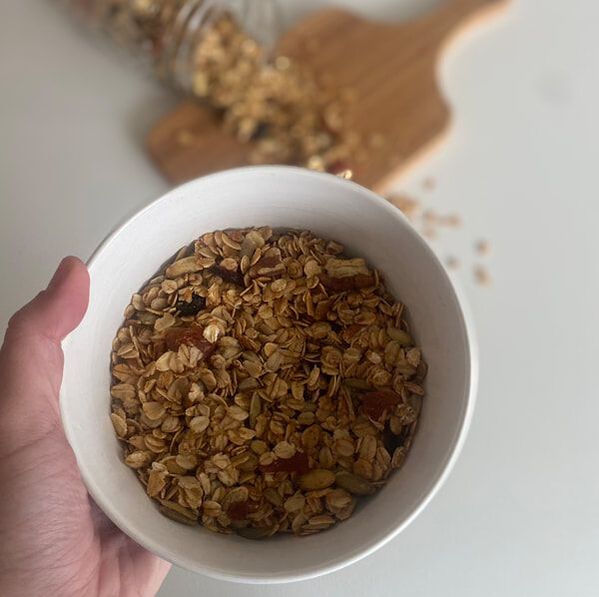
I was wandering the aisles of Trader Joes the other day and I happened upon a new possible smoothie addition in the frozen fruit aisle, Acerola Puree Packets. I was excited to learn that each 3.5oz packet contained 1180% vitamin C! I thought it would be a perfect ingredient to incorporate for a new immunity boosting smoothie I was working on. My favorite thing about using Acerola puree is that they contain NO sugar, making it a perfect low calorie addition to my morning smoothie!
Immunity Boost Smoothie (makes 2 smoothies) 1.5 cups of Unsweetened Almond Milk 1 frozen banana ¾ cup of frozen strawberries 1 Acerola Puree Packet (3.5 oz) 1.5 T nut butter (I use peanut butter) 2 tsp ground flaxseed 1 tsp vanilla extract ½ tsp hemp seeds Directions: Combine all of the ingredients (minus the hemp seeds) into a high speed blender and blend until smooth and creamy. Divide into two glasses and top with the hemp seeds. Directions to Make Ahead: Combine the banana, strawberries, Acerola packet, nut butter and ground flax into a freezer safe bag. Store in the freezer until ready to use. Add the contents of the bag along with the almond milk and vanilla to a high speed blender and blend until smooth! 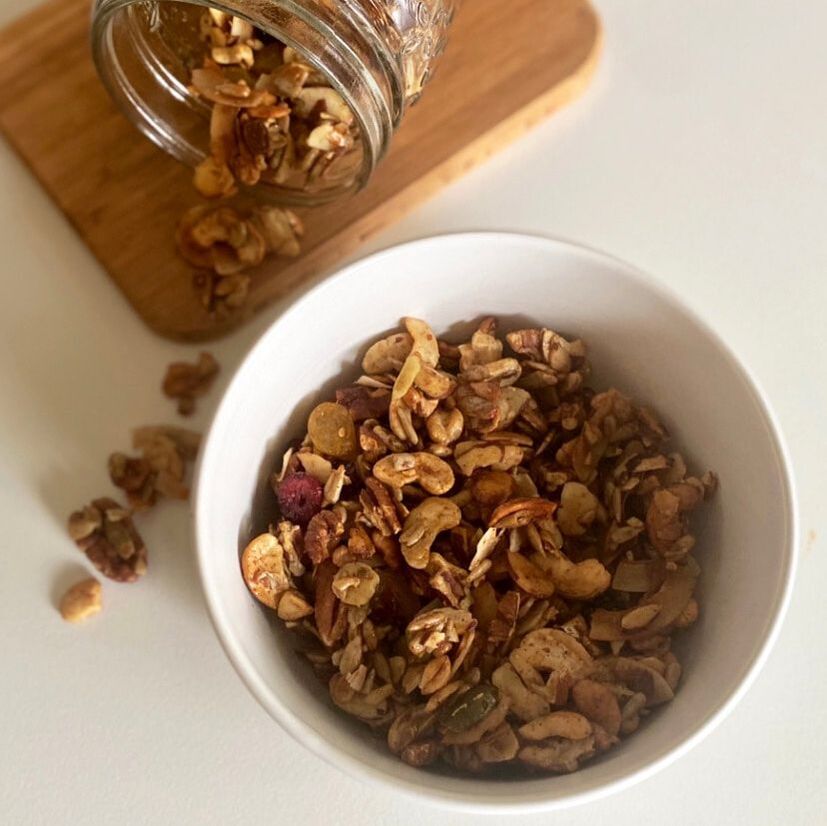
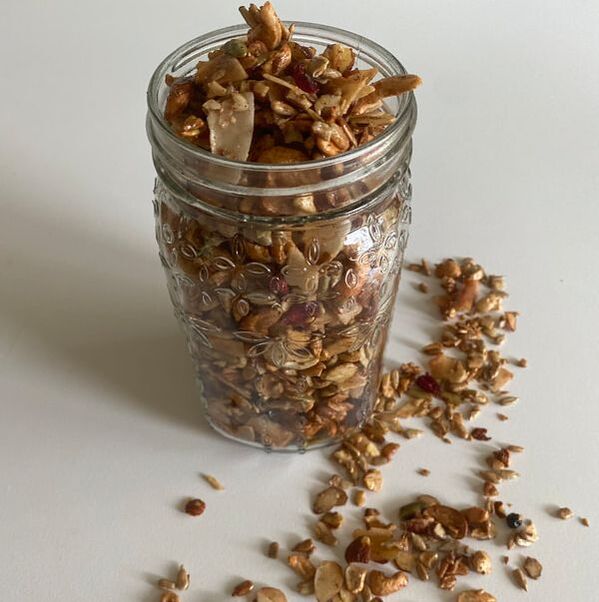
I am always amazed by some people's creativity with granola recipes. A few years ago I purchased some grain-free granola and I was blown away by how tasty it was! I couldn’t believe that granola didn’t need its usual main ingredient, oats, and that it could be just as flavorful without them. I found myself dreaming of that granola a few weeks ago as I was wandering the aisles of Trader Joes. I grabbed as many raw seeds and nuts as I could and decided to work on creating a similar recipe. The results were fantastic, and my family really liked it too. This granola is VEGAN, GLUTEN FREE and packed with plant power! I made a double batch this morning and enjoyed the sweet aroma that filled our home. The best part about granola is that it is PERFECT for a quick make ahead breakfast, or snack. We hope you enjoy this Seed and Nut Grain Free Granola recipe. Let us know if you try it!
Ingredients
¾ cup raw cashew pieces ¾ cup raw sunflower seeds ¼ cup raw pumpkin seeds ½ cup chopped raw pecans ¾ cup sliced raw almonds ¾ cup unsweetened coconut chips (I found mine at Trader Joes) 1T raw flax seed ½ T melted coconut oil ¼ cup maple syrup 1 tsp vanilla ½ tsp cinnamon ¼-½ cup of raisins or mixed dried berries Directions
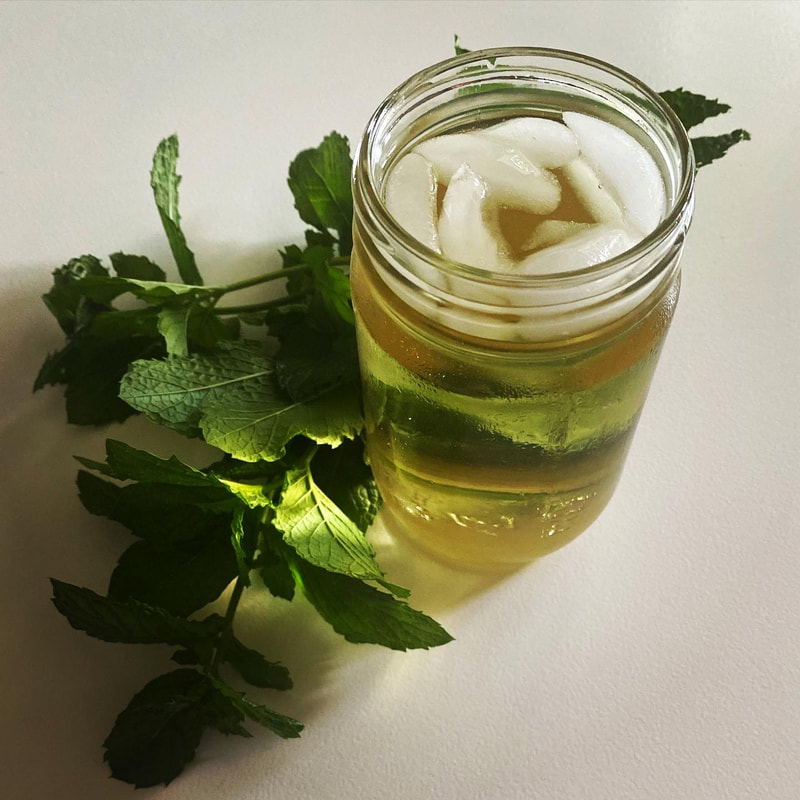
Weed Water has been a staple in my family for many years (no, not that kind of weed...). It was created by my uncle as a way to use up all of the mint and lemon balm in my grandma’s summer garden and has since then been something we’ve all enjoyed year after year. It truly isn’t summer until we’re enjoying weed water by the pool.
Weed water?! Why is it called that? Well, in truth, mint and lemon balm, the primary ingredients in weed water, are quite invasive plants. You need to be careful when planting them, making sure to use separate containers or they will slowly but surely take over your garden much like weeds do, hence the reason we call it Weed Water. This is a wonderful make ahead solution that will reduce the temptation to turn to sugary drinks on warm summer afternoons. While there is no right or wrong way to make this, please make sure that all of your herbs are rinsed thoroughly! Leave a comment and let us know what you used in your “weed” water. Happy summer!! 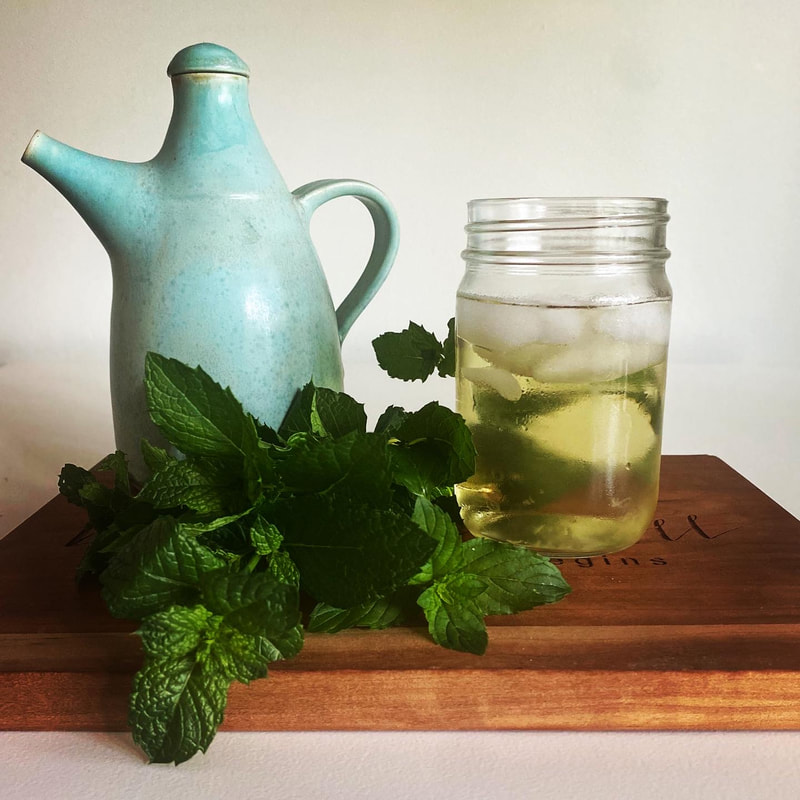
Ingredients
A handful of fresh spearmint (leaves and stems)* A handful of fresh sweet mint or peppermint (leaves and stems)* A handful of fresh lemon balm (leaves and stems) Water Directions
* You can use any type of mint but this recipe is my favorite. ** Make sure your pitcher is safe to handle boiling water. 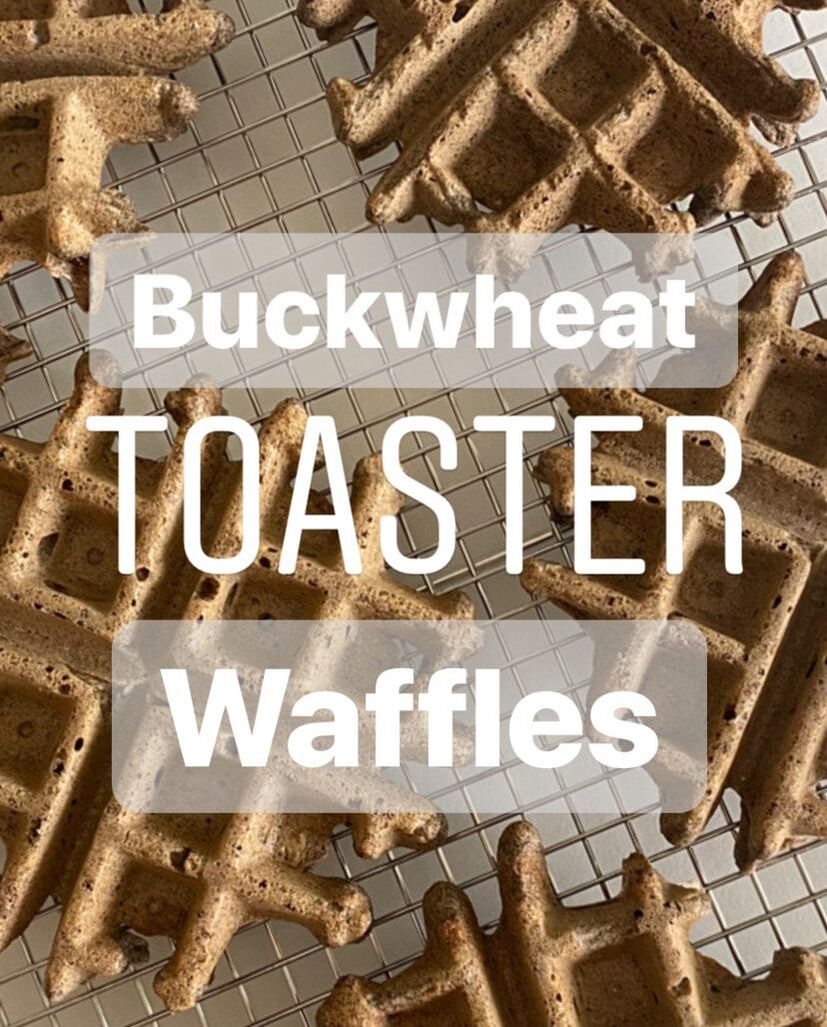
This week I was on a quest for easy freezer friendly waffles. I haven’t been able to find a good frozen waffle from the grocery store so I decided to try making my own recipe. I also wanted to incorporate Buckwheat flour because I read that it is a good source of easily digestible plant based protein and is good for heart health. The results turned out great! I was able to enjoy one (ok.. more like 2) and place the cooled waffles directly in the freezer. The next morning I popped one in the toaster and within minutes I had a “fresh off the waffle iron” crispy waffle!! I made some blueberry jam from my Peanut Butter and Blueberry Chia Seed Oatmeal recipe and stored it in the fridge for an easy topping! These are the PERFECT make-ahead solution for your busy weekday mornings. I hope you enjoy!
Ingredients (makes 5-6 waffles) 1 T lemon juice 1 cup unsweetened almond milk 1 egg 1 tsp vanilla 1 cup buckwheat flour ¼ cup all purpose flour 1 tsp baking powder ½ tsp baking soda 1T ground flaxseed 3T coconut sugar (or white sugar) ½ tsp cinnamon ⅛ tsp nutmeg Directions

I have been experimenting and doing lots of research with protein powders and vitamins this past week. As a vegetarian I am often searching for creative ways to add protein to my diet. I came across the brand Nuzest and I ordered a small pack of their vanilla pea protein powder with the intent on adding a couple of scoops to my smoothies. I really liked the idea of pea protein vs. soy! It was expensive vs. other brands that I have seen, but I was fun to try something new. If you are making this smoothie, feel free to use ANY brand of protein powder. Please share in the comments section below and let me know what your favorites are so I can try them too! If you don’t have protein powder, just eliminate it from this smoothie and add raw hemp seed instead. I also discovered some amazing peanut butter from Trader Joes, “Organic Creamy Peanut butter with Valencia peanuts.” It only has one ingredient, organic peanuts!! My trick with one ingredient peanut butter is to turn it upside down in your pantry so that the oils incorporate. Your peanut butter will be super creamy without all the oil on top and no need to stir!! I combined these new found ingredients with three kinds of berries and some oat milk and the results were fantastic!! I Hope you enjoy this Make ahead of Monday treat as much as I do and I hope it makes for a yummy start to your Monday morning!
Ingredients 1.5 cups unsweetened oat milk ½ tsp vanilla extract 2 tsp vanilla protein powder (optional) 1 frozen banana ½ cup frozen strawberries ¼ cup of fresh or frozen raspberries 1T creamy peanut butter 1 acai packet (can be found at Trader Joes in the frozen aisle) Directions
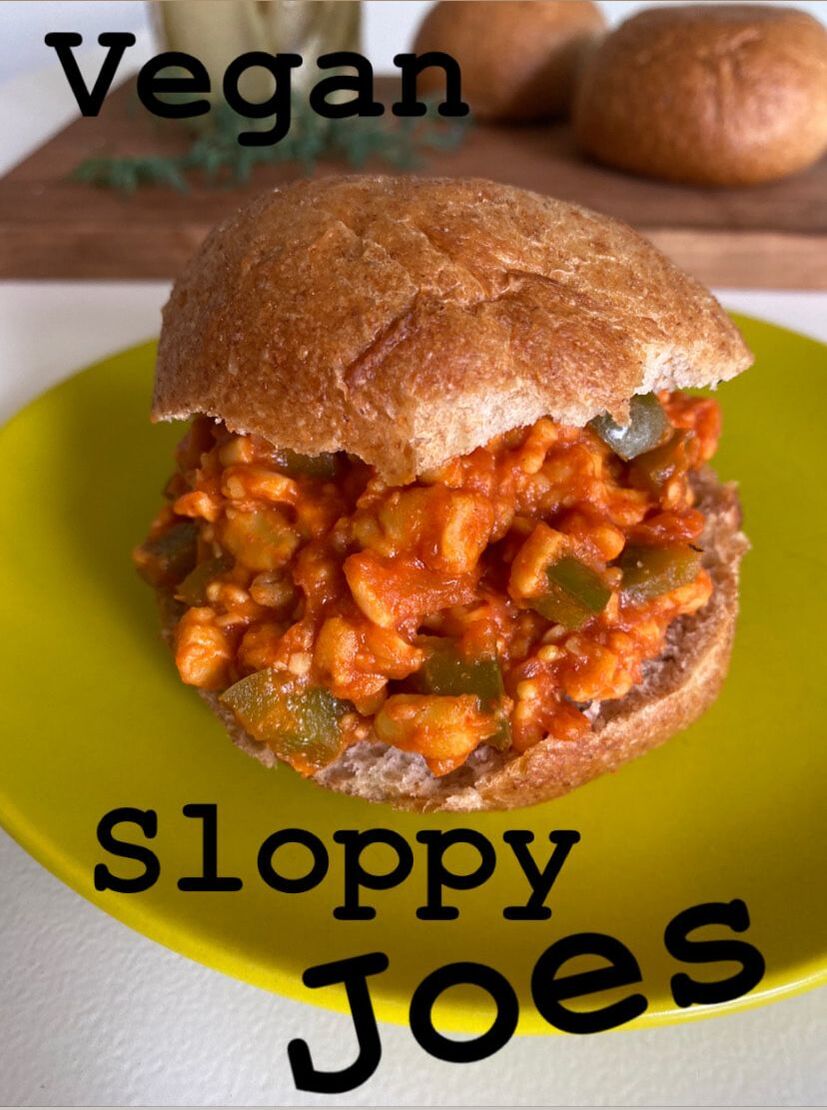
I have a fond memory of going to my Great Aunt Rosemary and Uncle Mickey’s house in Arizona when I was a kid. They had a large pool in their backyard and we would swim and have lunch with them each time we visited Arizona. My Aunt always served good food, and I especially remember loving her sloppy joes! My sister and I would add chips to our sandwich for an extra crunch and scoop up the extra filling on our plates with more chips. There is something special about a sloppy joe sandwich that makes me think of those sunny days by their pool in AZ. Today this Vegan version is dedicated to my Great Aunt and Uncle who have since passed away. I hope you enjoy this flavorful sandwich and that it is accompanied by sunny days and happy moments.
Ingredients ½ cup diced yellow onion 1 small green pepper diced 1T olive oil 16oz tempeh ¾ cup of tomato sauce ½ cup ketchup 1T yellow mustard 1T apple cider vinegar 2 tsp brown sugar ½ tsp onion powder ½ tsp garlic powder 1tsp smoked paprika ½ tsp salt ¼ tsp pepper Directions
|
AuthorI am a music teacher, professional musician and a vegetarian. I created this site with the mission to share recipes that make life a little more organized, and enjoyable! Archives
January 2022
Categories
All
|
 RSS Feed